Create Entra ID Application
To successfully connect to Microsoft SharePoint Online using the tenantId and clientId parameter in the storage.yaml, an application must be created in Microsoft Entra ID (formerly Azure AD). This application will manage the API permissions for both configuration and deployment.
The outcome of this chapter is to obtain the necessary values from the created app to continue with the configuration or data model deployment.
Create new Entra ID Application
Follow the steps below to create and configure a new Microsoft Entra ID application to work with aqishare.
-
Log in to Microsoft Entra ID.
-
Navigate to Identity -> Applications -> App registrations. Alternatively, you can enter "App registrations" into the global search bar to quickly locate the section.
-
Create a new app using the New registration button:

-
Choose a name for the app, such as SAPIntegration, and select the supported account types based on your requirements:

-
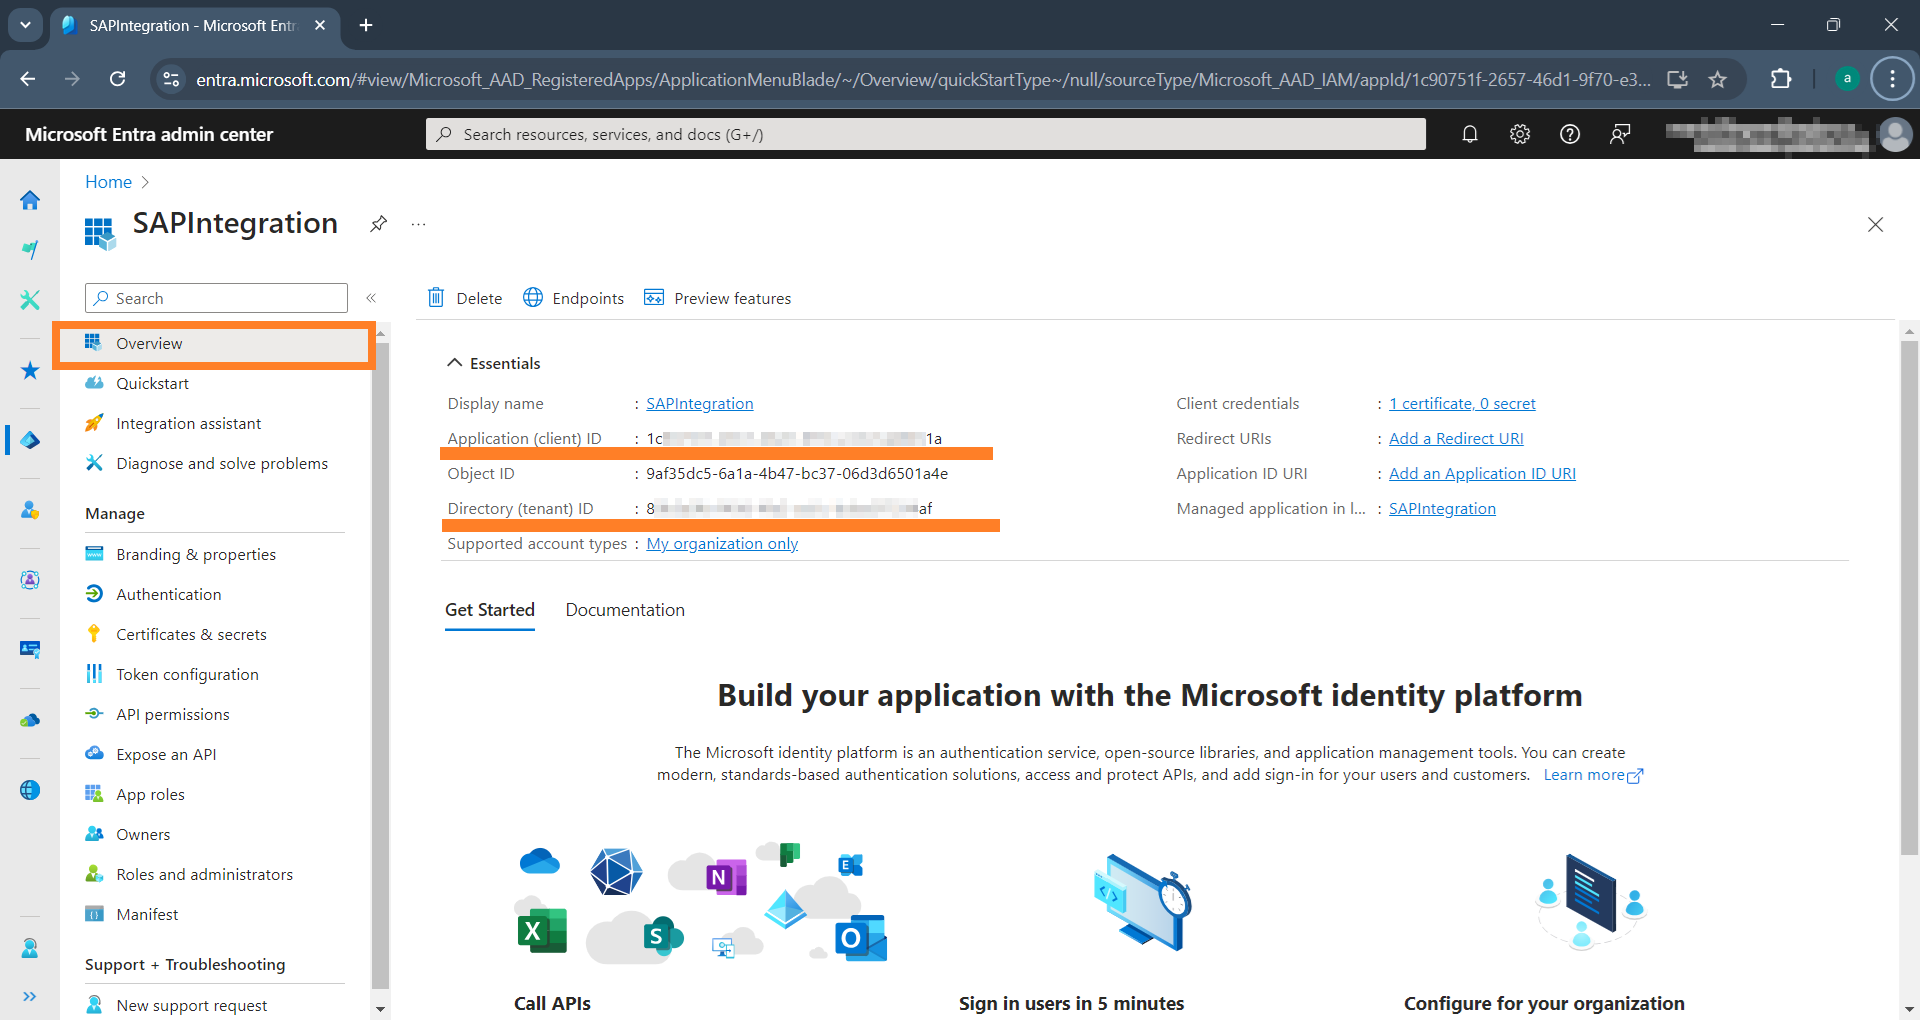
The application has been created, and you are now on the application's overview page:

Upload Certificate
To authenticate aqishare through this app against SharePoint, a certificate is required and the public key has to be uploaded to the newly created app.
The creation of the certificate is not covered in this documentation. The certificate must already be available. If you do not have one yet, you can follow the instructions, for example here: https://go.spflow.com/auth/strategies/azure-certificate-auth, to create a self-signed certificate that can be used.
-
Navigate to Certificates & secrets to upload the certificate (public key) to the app:

-
Once added, it should appear as shown in the following screenshot:

Add API Permissions
Configure the necessary API permissions required by the application. The following table provides an overview of the required permissions along with their description.
| Permission | API | Type | Description |
|---|---|---|---|
| Sites.Manage.All | SharePoint | Application | aqishare requires this API to run in the background to create, update, or delete documents stored from the SAP system, as well as to create or delete folders in the lists. |
To add the permssions, follow these steps:
-
Navigate to the API permissions menu of the newly created SAPIntegration app.
noteBy default, the new application automatically receives the User.Read permission of the Microsoft Graph API. This is a delegated permission acting on behalf of a signed-in user and is therefore not required by the app -> Remove this permission!

-
Click Add a permission, choose Microsoft SharePoint, then click
Applications permissionsand search for Sites. Under the Sites section select the Sites.Manage.All permission and add it: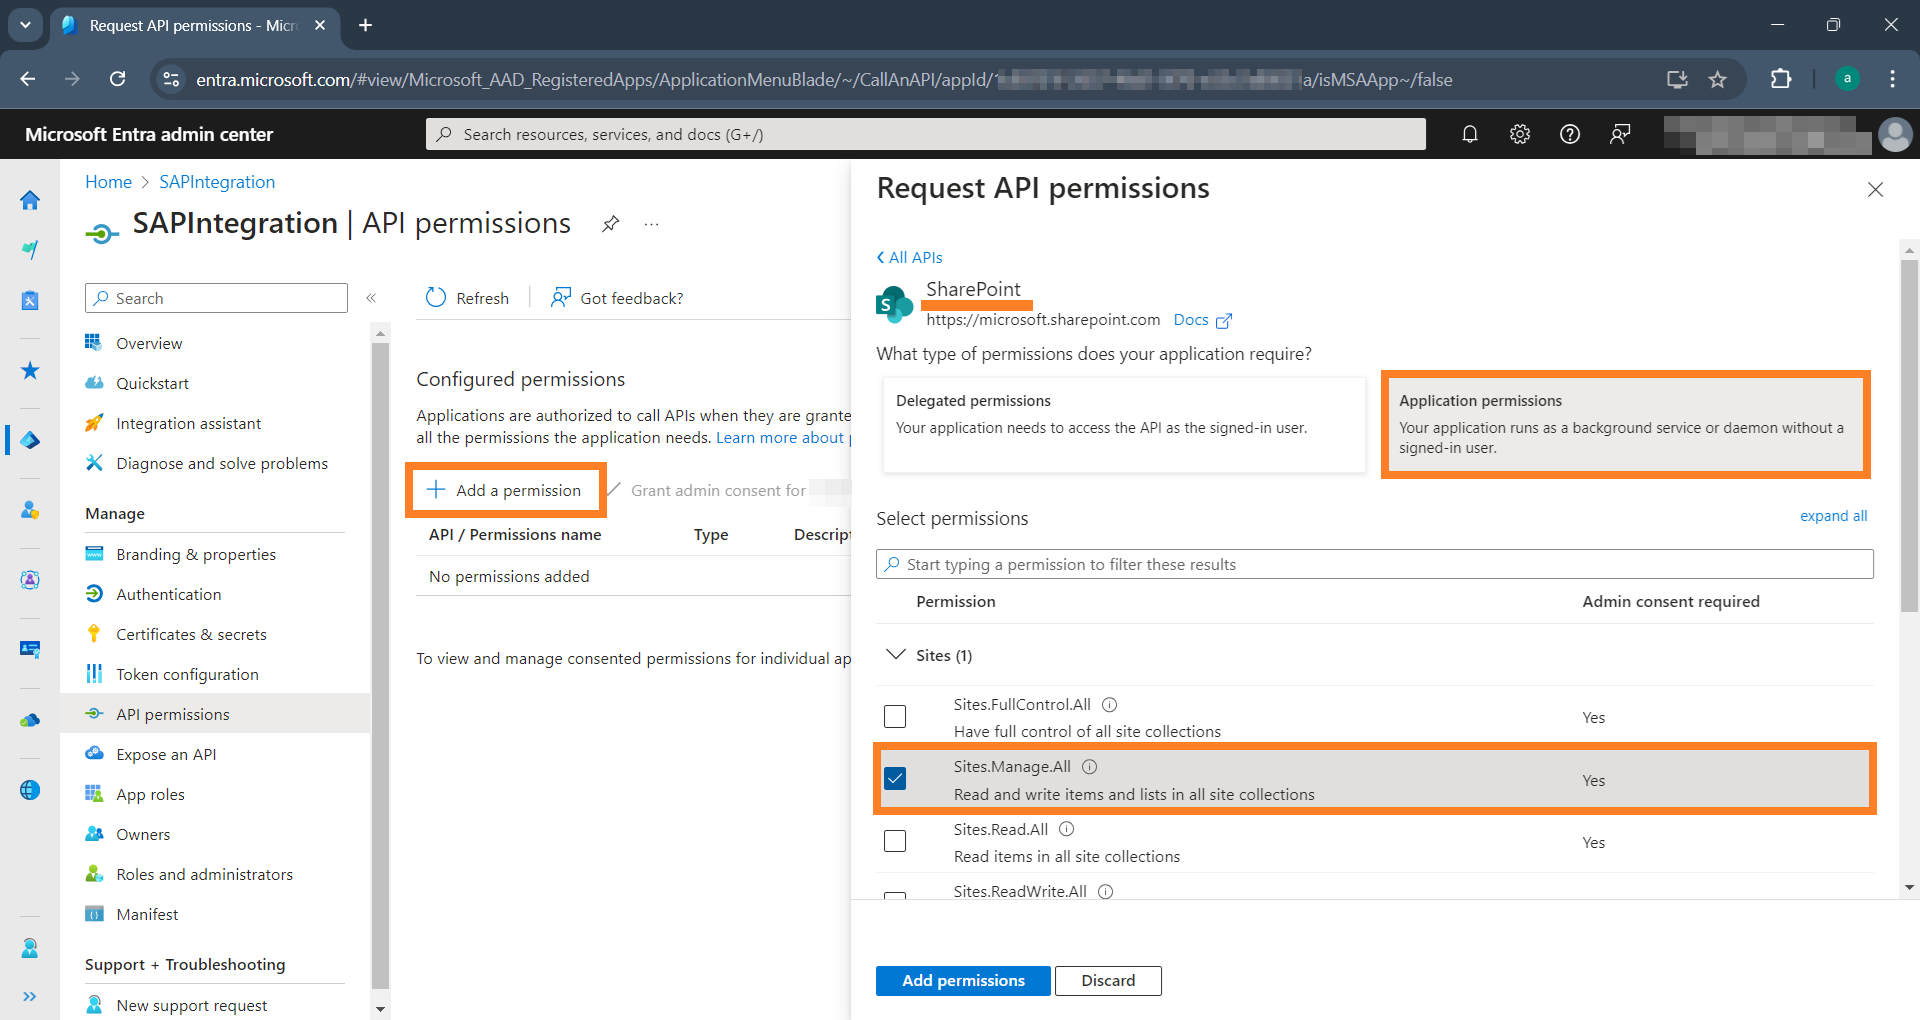
-
Again, click Add a permission, Microsoft SharePoint, now select
Delegated permissionsand choose AllSites.FullControl permission: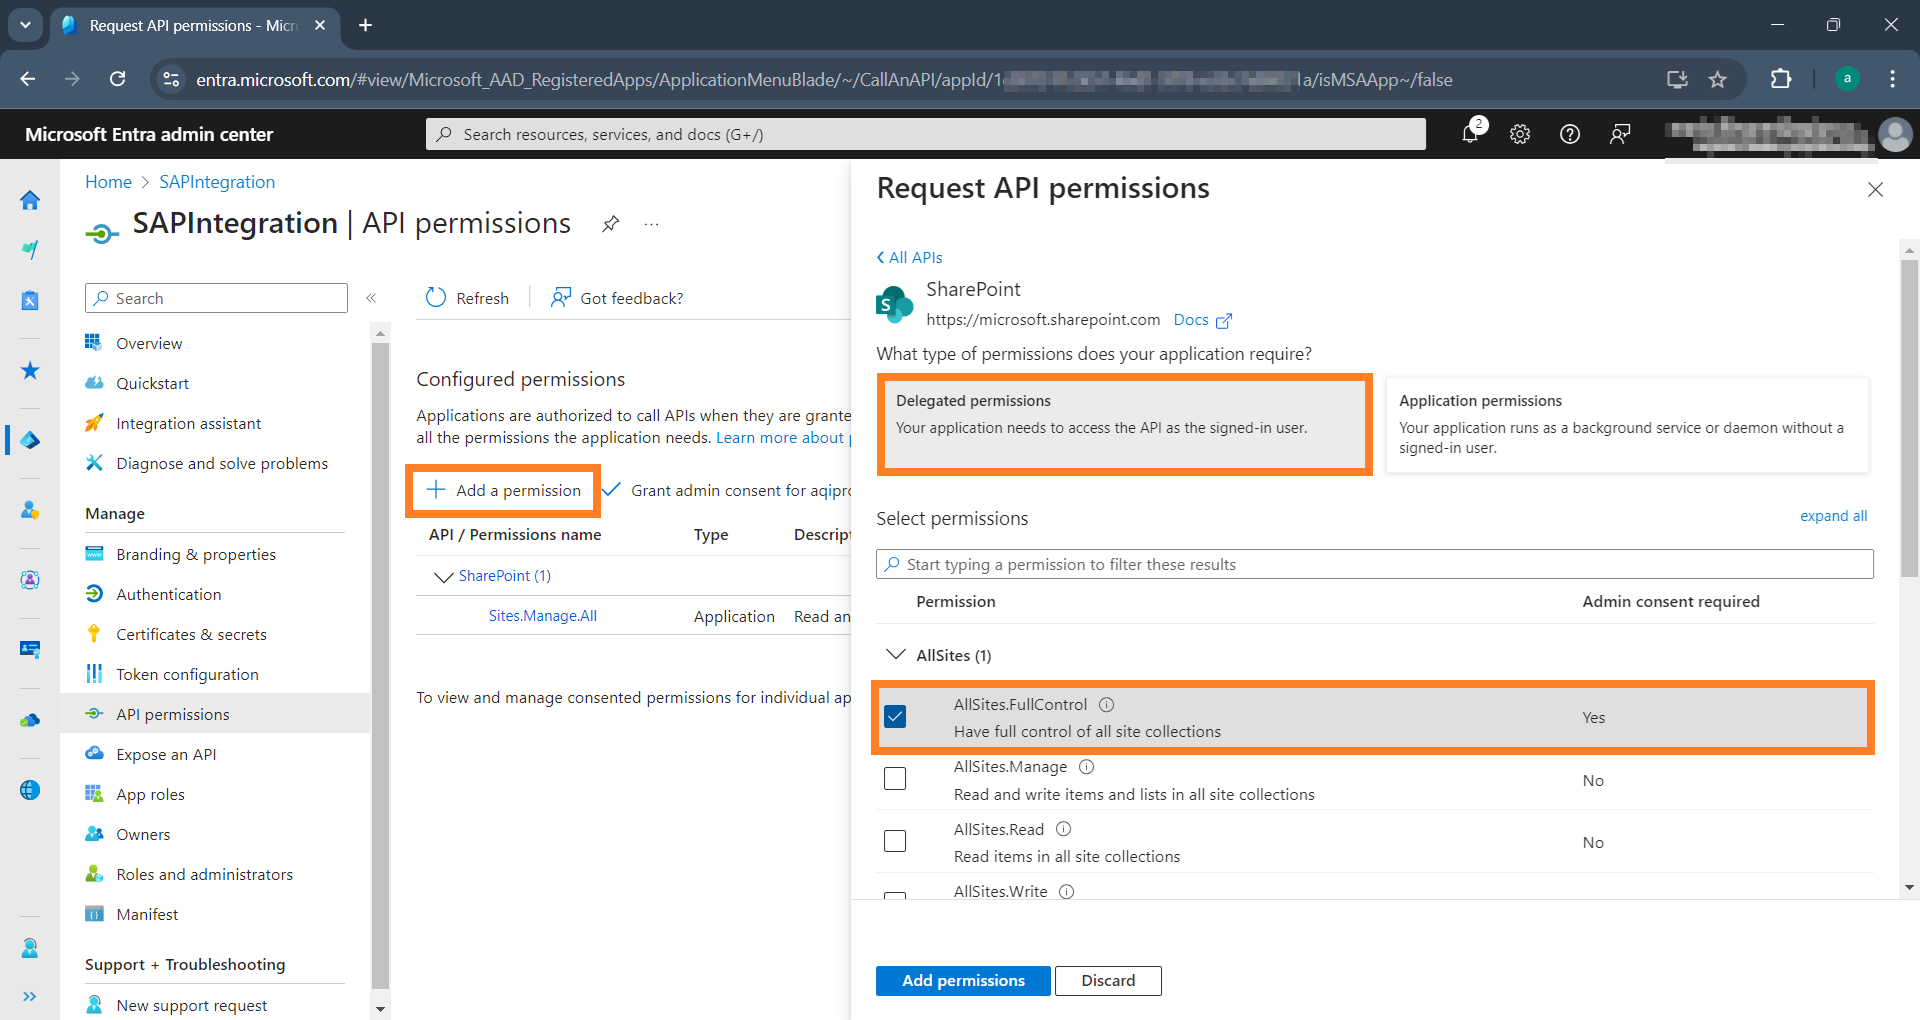
-
The required permissions has been added.
Grant Admin Consent
Now, you must grant admin consent for your tenant to the app. Granting admin consent is essential for application permissions because they operate at the organization level, and only an administrator can approve such permissions for security reasons.
Click on Grant admin consent for Tenant and approve the grant. If the consent has been successfully granted, it should appear as shown in the following screenshot:

All required API permissions have been successfully set up and granted.
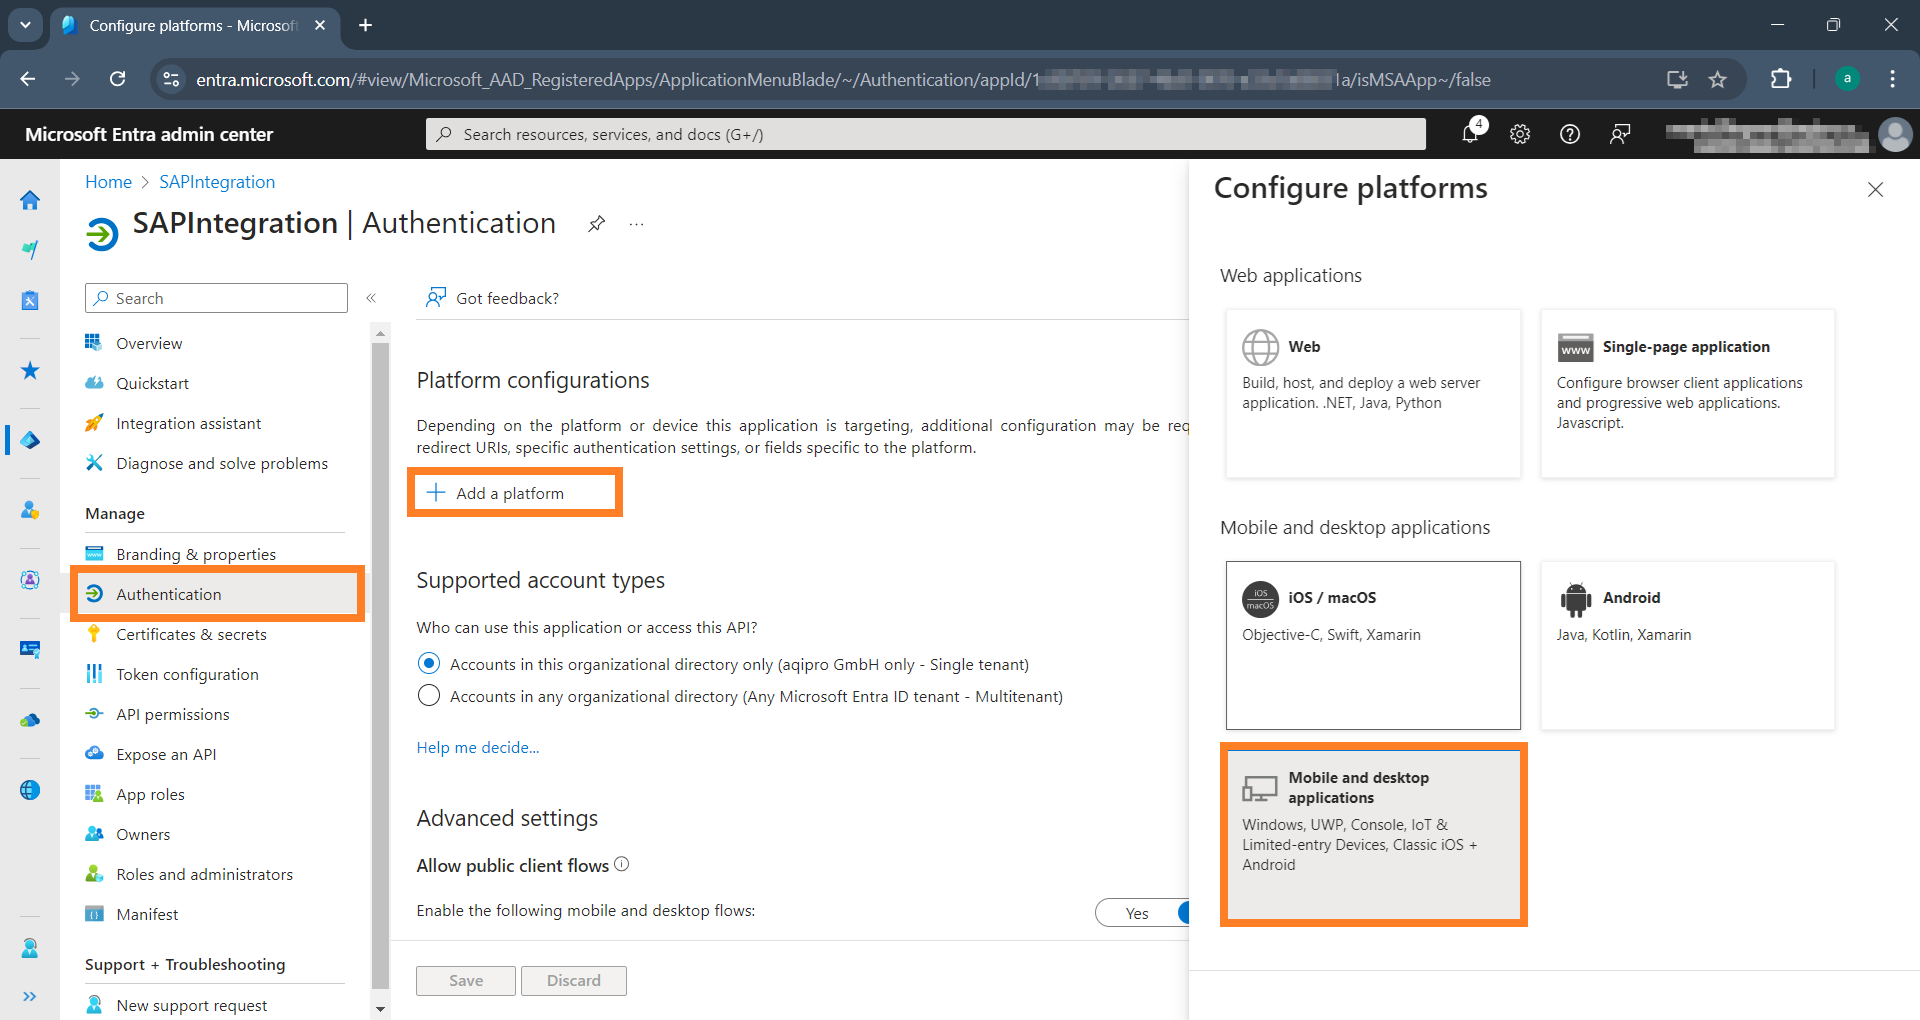
Add Redirect URI
To deploy the data model to SharePoint via PnP PowerShell, you must set up a redirect URL (also known as a Reply URL) to http://localhost in the authentication section of the application. The interactive login flow in PnP PowerShell uses localhost as a loopback address to process the authentication response locally on the machine performing the deployment. Without this configuration, the deployment process cannot successfully complete.
-
Navigate to the Authentication menu of the application to add a new platform for Mobile and desktop applications.
-
Now, enter the value
http://localhostin the Custom redirect URIs field and click "Configure".
Retrieving Authentication Values
To continue the configuration of the related storage.yaml for connecting and authenticating aqishare to SharePoint, you will need specific values from the Microsoft Entra ID application you created above. These values can be found on the application's overview page of the app. Refer to the following mapping table and the screenshot below.
| Microsoft Entra ID Application Overview Page | Corresponding Parameter in storage.yaml |
|---|---|
| Application (client) ID | clientId |
| Directory (tenant) ID | tenantId |